
Building DIY cable lugs from aluminum castings involves several steps, including casting the aluminum, machining it to the desired shape, and drilling precise long holes on a lathe. Below is a step-by-step guide to help you through the process:
### Materials and Tools Needed
Materials:
1. Aluminum ingots (for casting)
2. Sand for casting mold (or a suitable mold material)
3. Mold release agent (to prevent the aluminum from sticking to the mold)
Tools:
1. Foundry setup (crucible, furnace, etc.)
2. Sand casting equipment (patterns, flasks, etc.)
3. Lathe (for machining and drilling)
4. Drill bits (suitable for aluminum)
5. Measuring tools (calipers, micrometers)
6. Safety equipment (gloves, goggles, etc.)
### Step-by-Step Guide
#### 1. Aluminum Casting
1. Design the Pattern:
- Create a wooden or metal pattern of the cable lug. The pattern should be slightly larger than the final product to account for shrinkage during cooling.
2. Prepare the Sand Mold:
- Use the pattern to create a cavity in the sand mold. Ensure the mold is well-packed and the cavity is smooth.
- Apply a mold release agent to the pattern to facilitate easy removal.
3. Melt the Aluminum:
- Melt the aluminum ingots in a crucible using a foundry furnace. Heat the aluminum to its melting point (approximately 660°C or 1220°F).
4. Pour the Aluminum:
- Carefully pour the molten aluminum into the prepared sand mold cavity. Fill the mold completely and allow it to cool and solidify.
5. Remove the Casting:
- Once the aluminum has cooled, remove the casting from the sand mold. Clean off any excess sand and trim any sprues or excess material.
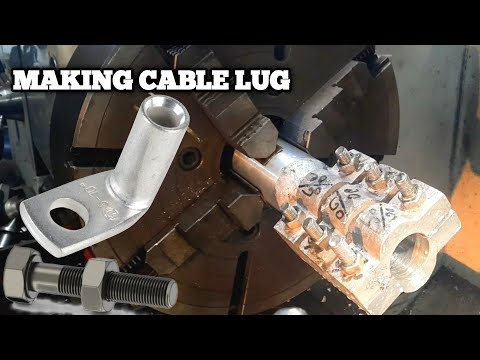
#### 2. Machining the Cable Lug
1. Initial Shaping:
- Place the aluminum casting in a lathe chuck. Use appropriate cutting tools to machine the casting to the rough dimensions of the cable lug.
- Ensure all surfaces are smooth and free of casting imperfections.
2. Drilling the Long Hole:
- Set up the lathe for drilling. Ensure the aluminum workpiece is securely held in the chuck and properly aligned.
- Select a suitable drill bit for the desired hole diameter. For long holes, a longer drill bit or a series of step drilling with progressively larger bits may be necessary.
- Use cutting oil or lubricant to reduce friction and prevent the drill bit from overheating.
3. Drill the Hole:
- Start with a center drill to create a starting point for the drill bit. This helps in maintaining the accuracy of the hole.
- Drill the hole slowly, withdrawing the bit frequently to clear chips and apply more lubricant.
- For deep holes, use a peck drilling technique, drilling a short distance at a time and then clearing the chips.
- Ensure the hole is drilled to the required depth and diameter.
#### 3. Finishing Touches
1. Final Machining:
- Perform any additional machining operations required to achieve the final dimensions and surface finish of the cable lug.
- Check all dimensions with calipers or micrometers to ensure accuracy.
2. Deburring and Smoothing:
- Deburr any sharp edges and smooth the surfaces with fine sandpaper or a file.
3. Quality Inspection:
- Inspect the finished cable lug for any defects or inaccuracies. Ensure the hole is straight and meets the required specifications.
### Safety Precautions
- Always wear appropriate personal protective equipment (PPE) such as gloves, goggles, and protective clothing.
- Handle molten aluminum with extreme care to prevent burns and injuries.
- Use proper ventilation to avoid inhaling any fumes from the melting process.
- Follow all safety protocols when operating machinery like lathes and drilling equipment.
By following these steps carefully, you can create high-quality DIY aluminum cable lugs suitable for electric supply applications.
Comments
Post a Comment